|
|
|
Cost: $10
Difficulty: |
Procedure
and photos courtesy of Micah O'C
|
|
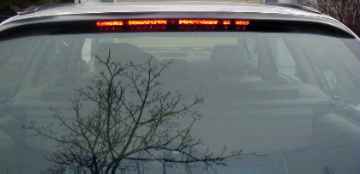
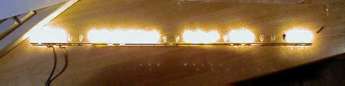
Bulbs don't last forever, at one point you will have to change
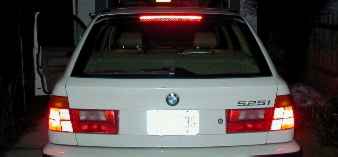
one or several bulbs on your hatchback. The highmount (3rd)
brakelight on the BMW E34 Touring wagon is a strip of 24 1.4
watt bulbs mounted in a plastic lens.
|
| Procedure |
- Phillips and various flat screwdrivers.
- Soldering iron.
- Replacement bulb - PN
63 21 8 362 363 - 3.90 each at the dealer.
1. Before you do anything, identify the bad bulbs. You will
(or at least should) have means to verify things later, but
preparation is key.
2. Open the tailgate window and unscrew the 2 screws that
hold the brakelight in the black spoiler at the top of the
window. They are flat bladed screws.
|
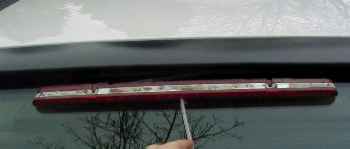
| 3. Gently, and with a thin, taped-up flat screwdriver,
pry the brakelight down and out of the spoiler. Work from one
end, then the other, don't chip the window or the black spoiler. |
|
| 4. Remove 5 small screws holding the back of the
fixture to the lens, remove them carefully, don't break any
plastic. |
|
|
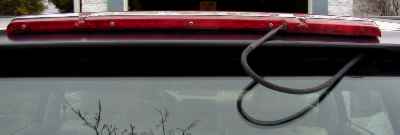
5. Pop the back of the fixture off the lens without
damaging the foam seal, unplug the 2 wires from the back of
the light strip, and retire to the workbench, inside, where
it is warm, and there is beer. |
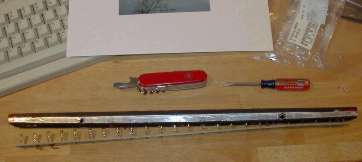
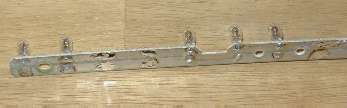
| 6. Very gently, starting with a small screwdriver
and graduating to larger ones as the gap increases, pry the
lightbulb strip out of the lens housing. The strip is held in
the lens by pressure on the bulbs, so you do NOT want to work
anything too hard. Go slowly and gradually work the entire length
of the strip out a bit at a time. |
|
|
|
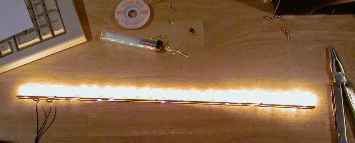
7.You should have some 12 volt DC power at your
workstation so that you can test the fixture. Apply power to
the fixture to verify which bulbs are bad. |
|
8. Using the soldering iron, heat the old solder and remove
the bad bulbs.
|
|
|
|
9. Solder in the new bulbs. Put power to the strip
to test it, and repeat until you have light in all bulbs. |
|
10. Apply a small amount of vaseline to all of the bulbs
to ease reinsertion. Remember that the bulbs are what holds
the bulb strip into the lens, and you do not want to put too
much pressure on the bulbs or the wiring/solder during reinsertion.
11. Snap the bulb strip back into the lens housing, and test
the fixture again. Repeat the steps above to replace any dead
or broken bulbs.
12. Installation is reverse of removal.
Notes from Micah personal experience:
1) Working with plastic in the cold sucks. Try and keep the
plastic parts warm, especially when you are screwing things
back together or the brittle, cold stuff will break, and you
will have to buy a whole new lens. This didn't happen to me,
but I feared of it the entire time.
2) It is very important to have some 12V power at your workspace.
Between removing the brakelight and taking everything apart,
I had 2 more lights that would not light up at all, and 4
that became intermittent (they wouldn't light up, tap-tap,
there they are!). I had bought 10 bulbs to replace what looked
like 5 bad ones, and I am left with 2 that sort of come and
go. This summer I will be buying another 15, and I will replace
all of the ones I did NOT replace this first time around.
You may want to spend the money and replace all of them at
one shot. The time saved in testing will make up for the time
spent in replacing bulbs.
Notes from George:
There were four bulbs not lit so I ordered replacements from
a BMW dealer for $5.96 each. However, after removing the bad
bulbs, I discovered that all my "bad" bulbs were
actually good and the problem was in the soldered joints.
I reinstalled the old bulbs and all is bright! If I had to
do this again, I would check the bad bulbs first with a 12
volt source before ordering new ones.
|
|
Micah O'C '92 525iT

|
|
 |
|
|
|
|
©2000 BMWE34.net
|
-
Home of the Bmw 518i, 520i, 524td, 525tds, 525i, 535i, 530i, 540i,
M5 and other Bmw E34 chassis -
|
|